Hey there! As a supplier of metal honeycomb, I'm stoked to share with you a comprehensive guide on how to install a metal honeycomb. Whether you're a DIY enthusiast or a professional contractor, this guide will walk you through the process step by step.
Understanding Metal Honeycomb
Before we dive into the installation process, let's quickly talk about what metal honeycomb is. Metal honeycomb is a lightweight, strong, and versatile material made from thin metal sheets formed into a hexagonal pattern. It's commonly used in various industries, including aerospace, automotive, architecture, and more. The unique structure of the honeycomb provides excellent strength-to-weight ratio, making it ideal for applications where weight reduction is crucial without compromising on strength.
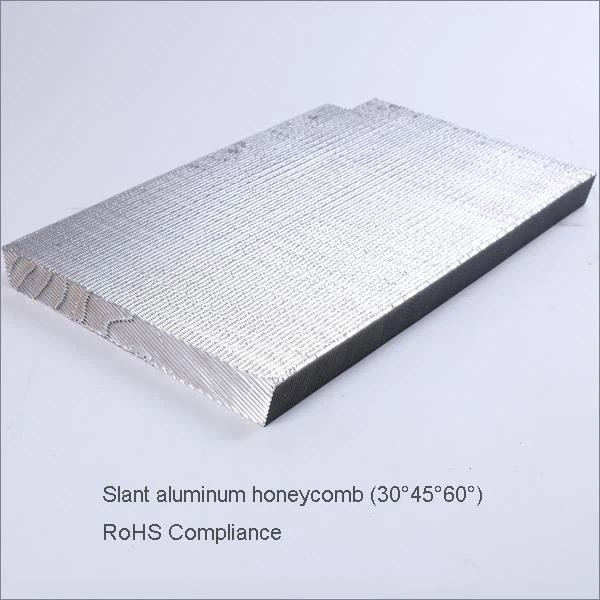
There are different types of metal honeycombs available in the market, such as Aluminium Honeycomb Core For Honeycomb Composite Panels, Grooved Aluminum Honeycomb, and Slant Aluminum Honeycomb. Each type has its own unique properties and applications, so it's important to choose the right one for your project.

Tools and Materials You'll Need
- Measuring Tape: To measure the area where you'll be installing the metal honeycomb.
- Utility Knife: For cutting the metal honeycomb to the desired size.
- Adhesive: A high-quality adhesive suitable for bonding metal honeycomb to the substrate.
- Clamps: To hold the metal honeycomb in place while the adhesive dries.
- Safety Gear: Gloves, safety glasses, and a dust mask to protect yourself during the installation process.
- Substrate: A clean, flat, and dry surface to which the metal honeycomb will be attached.
Step 1: Prepare the Installation Area
The first step in installing a metal honeycomb is to prepare the installation area. Start by cleaning the substrate thoroughly to remove any dirt, dust, grease, or debris. Use a mild detergent and water to clean the surface, and then dry it completely with a clean cloth. Make sure the substrate is flat and free of any bumps or irregularities that could affect the installation.
Next, measure the area where you'll be installing the metal honeycomb. Use a measuring tape to get accurate measurements, and then mark the dimensions on the substrate using a pencil or a marker. This will help you cut the metal honeycomb to the right size.
Step 2: Cut the Metal Honeycomb
Once you have the measurements, it's time to cut the metal honeycomb to the desired size. Use a utility knife to score the metal honeycomb along the marked lines, and then break it along the scored lines. Make sure to wear gloves and safety glasses to protect yourself from any sharp edges.
If you need to cut the metal honeycomb into a complex shape, you can use a jigsaw or a band saw. Just make sure to use a fine-toothed blade to avoid damaging the honeycomb structure.
Step 3: Apply the Adhesive
After cutting the metal honeycomb to the right size, it's time to apply the adhesive. Choose a high-quality adhesive that is suitable for bonding metal honeycomb to the substrate. Apply the adhesive to the back of the metal honeycomb using a brush or a roller, making sure to cover the entire surface evenly.
Be careful not to apply too much adhesive, as this can cause the honeycomb to warp or buckle. Follow the manufacturer's instructions for the recommended amount of adhesive to use.
Step 4: Install the Metal Honeycomb
Once the adhesive has been applied, carefully place the metal honeycomb on the substrate, aligning it with the marked lines. Press the honeycomb firmly onto the substrate to ensure good contact with the adhesive. Use clamps to hold the honeycomb in place while the adhesive dries.
Make sure to leave enough space between the honeycomb panels to allow for expansion and contraction. Follow the manufacturer's instructions for the recommended spacing between the panels.
Step 5: Let the Adhesive Dry
After installing the metal honeycomb, let the adhesive dry completely according to the manufacturer's instructions. This may take several hours or even days, depending on the type of adhesive used and the environmental conditions.
During the drying process, make sure to keep the installation area clean and free of any dust or debris. Avoid touching or moving the metal honeycomb until the adhesive has fully cured.
Step 6: Finish the Installation
Once the adhesive has dried, remove the clamps and inspect the installation for any gaps or unevenness. If necessary, use a filler or a sealant to fill in any gaps or cracks.
Finally, clean the surface of the metal honeycomb with a mild detergent and water to remove any adhesive residue or dirt. You can also apply a protective coating to the honeycomb to enhance its durability and appearance.
Tips and Tricks
- Work in a Well-Ventilated Area: When working with adhesives, make sure to work in a well-ventilated area to avoid inhaling any fumes.
- Test the Adhesive: Before applying the adhesive to the entire surface, test it on a small area of the substrate and the metal honeycomb to make sure it bonds properly.
- Use a Straight Edge: When cutting the metal honeycomb, use a straight edge to ensure straight and accurate cuts.
- Follow the Manufacturer's Instructions: Always follow the manufacturer's instructions for the adhesive, the metal honeycomb, and the installation process.
Conclusion
Installing a metal honeycomb may seem like a daunting task, but with the right tools, materials, and instructions, it can be a relatively straightforward process. By following the steps outlined in this guide, you can ensure a successful installation and enjoy the benefits of using metal honeycomb in your project.
If you have any questions or need further assistance with installing a metal honeycomb, feel free to reach out to us. We're here to help you find the right solution for your needs. And if you're interested in purchasing metal honeycomb for your next project, we'd love to hear from you. Contact us today to discuss your requirements and get a quote.
References
- Manufacturer's instructions for the metal honeycomb and adhesive.
- Industry best practices for installing metal honeycomb.